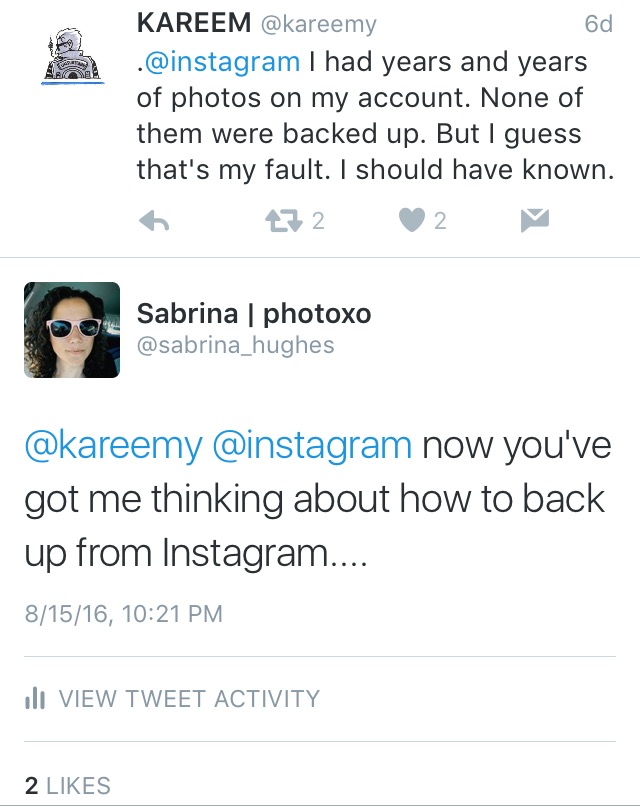
Last week someone I follow on Twitter experienced something really disheartening. His Instagram account was deleted without warning or justification. Among his tweets, one stood out to me:

“None of them were backed up. But I guess that’s my fault.”
Is it? Is it even possible to back up your photos in your Instagram account? The good news is, yes, it is possible. But they don’t make it easy.
Instagram is a hugely popular photo and video sharing app. It caught people’s attention initially because of its ease of photographing, uploading, and using creative vintagey filters on your images all without having to leave the app.
A few years ago it was purchased by Facebook. This year Instagram reached a huge milestone of having 500 million users! And more than 300 million of them use the service every day!
And yet, Instagram does not have an “export archive” option like Facebook and Twitter do. Furthermore, even from your own account you can’t save photos you have posted. Whether you’re using Instagram on your phone or, less popularly, on your computer, there is no way to download your photos directly via Instagram’s app.
I’m going to present a couple of solutions for freeing your photos from Instagram to ensure that if anything happens to your account (at their whim), you don’t lose years of photos.
There are essentially two ways to post your images to Instagram. One is to upload them from your phone’s Camera Roll. If you upload the image from your Camera Roll, then, unless you later delete that photo from your Camera Roll, you presumably have a copy. Right?
The other way to post is to use Instagram’s in-app camera to take your photo. If you use the in-app camera, the pictures you take do not automatically save anywhere except to your Instagram feed.
In order to save photos you take within the app, you have to go into Settings, then look for the option that says Save Original Photos and slide that switch to the on position. On my phone, when it is off, it is greyed out, when it’s on it’s blue. Now any photos you create within the app will be saved to your Camera Roll.
The great news about this setting is that it also saves everything you post to your Instagram Story. Have you already lost photos or videos you wanted to keep to the 24-hour time limit of Stories? This will help going forward.
Now, don’t forget to back up your Camera Roll!
Ok, so that’s fine for images that you make after turning on that setting, but for me, who always uploads from Camera Roll, that part is far less of a concern than photos I posted years and years ago that I don’t have anywhere else other than locked into Instagram.
If you Google “how to back up your Instagram images,” the top result is Instaport, WHICH IS NOW DEFUNCT. This sounds like it was a great app, but from what I can see, ever since Facebook took over Instagram in 2012, Instaport doesn’t work. So, I did some legwork so you don’t have to.
I’ve basically found one way to free your images from Instagram. And it’s to send them to Facebook.
This method is inconvenient for backing up hundreds and hundreds of photos, but if this is the only way to get at those hundreds and hundreds, just set aside an afternoon and do it.
First, go into Settings in Instagram. A few lines above Save Original Photos you’ll see the option for Linked Accounts. Tap there. Here you can choose to link your Instagram account to any number of other social media sites. The only one these instructions definitely works for is Facebook.
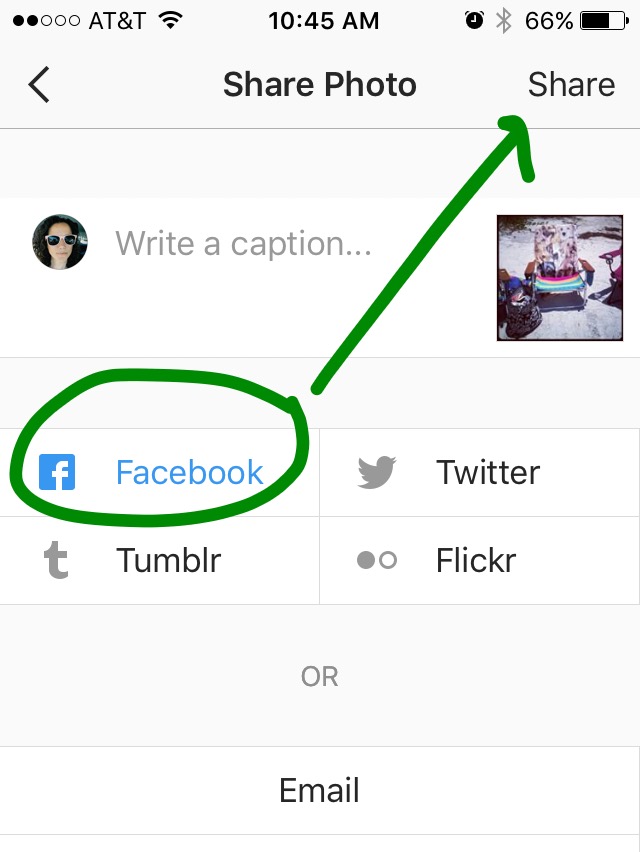
Sharing via Twitter (or also via or email or copy link, which you’ll see later) will not work to get your photo free! It will send you to Instagram’s phone app or desktop application, and we know you can’t download from there.
If you send it to Tumblr, they compress the image and make it smaller than its original size. You don’t want that. Flickr seems to have disabled the communication between it and Instagram, though maybe nobody has told Instagram that. I couldn’t get my image to share to Flickr. Your mileage may vary.
So, link Facebook if it’s not already.
Ok, now go back to your profile and select one of the photos you want to free from Instagram’s clutches. Mine was the very first photo on my Instagram account, posted back when I had a really really low quality camera.
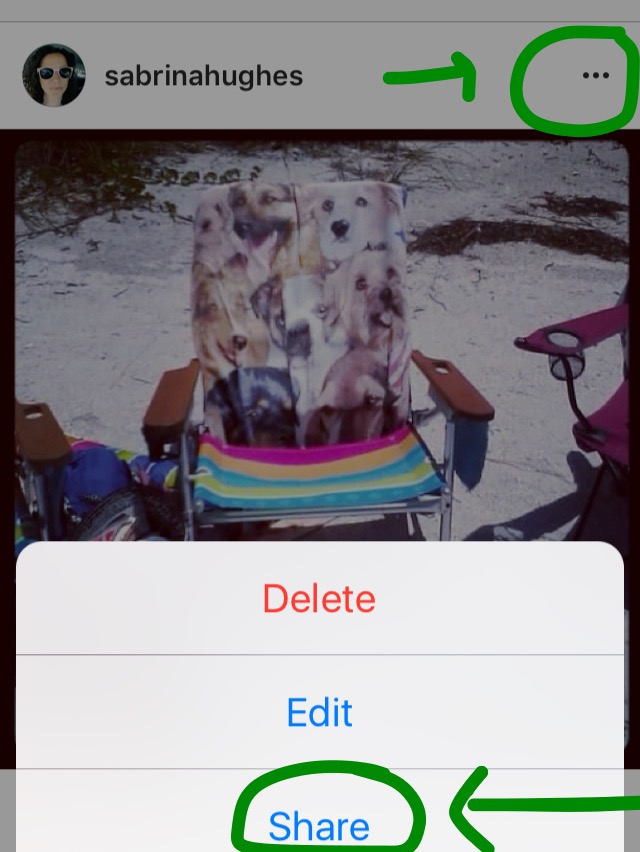
Tap the three dots in the top right, then choose Share.


Now, pop on over to Facebook and you should see your Instagram photo on your timeline. To save the image, click on it and choose Options then Download beneath the image. Or, if you’re doing a bunch, create an album, move it to the album, then download the album at once when you’re done.
Yes, you have to send each photo you back up to Facebook one-by-one. There is no bulk option within Instagram, or any third party apps that can currently bulk export.
I sincerely hope that as Facebook finally begins to integrate Instagram into its fold for real, they address this issue. Or at least allow third party apps access to Instagram’s API to provide this necessary backup option in a simpler and less time consuming manner.
Fortunately for Kareem, who inspired this search for a backup method, Instagram restored his account just as suddenly and without explanation as it had been deleted. Unfortunately for many of us, this doesn’t always happen.
This is a sobering reminder that we don’t “own” our social media accounts. If you post your photos to social media, keep the originals and back them up. Don’t let the future of your family’s memories fall victim to the whims of a social media company.

Recent Comments